Feeds:
Posts
Comments

Archive for the ‘How to’ Category

Rosette Pillow [DIY]

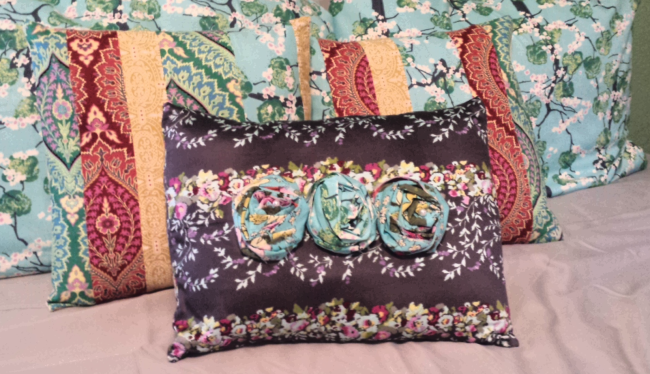
Rosettes are my thing right now. I’m putting them on everything. This pillow is the latest in this trend. It’s so cute and easy, how could I not share?

Image

Supplies

  • Fabric for the pillow
  • WOF (width of fabric) x 6 inch strips for each rosette
  • Pearls or other center accents
  • Spray adhesive
  • Glue gun and glue
  • Pillow form

Make it!

  1. Make a pillow cover to fit your pillow form. If you don’t know how to do this, Sew Mama Sew has a great tutorial here.
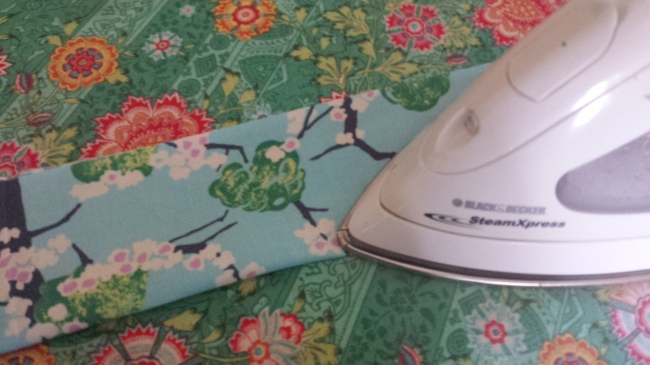
  2. Make your rosettes. Iron each WOF x 6 inch strip in half lengthwise, right sides out.
  3. Spray the entire thing liberally with spray adhesive.
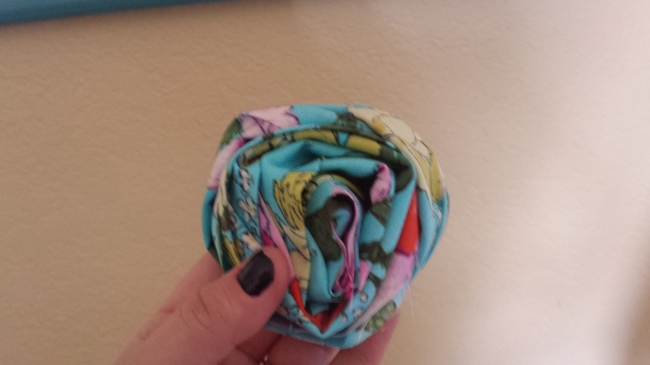
  4. Pinch on end in your left hand, and use your right hand to begin wrapping the strip around itself. Allow it to twist to make “petals.”
  5. Using a tiny bit of hot glue, glue your pearl or other accent to the middle of the rosette. Press down on the rosette with your hand to flatten it, secure the pearl, and secure the spray adhesive.
  6. Drizzle hot glue all over the back of the rosettes, and glue them onto the pillow case.
  7. Insert your pillow form. You’re done!

Image

Image

Please don’t look at my nails. I got a little over zelous picking off the spray adhesive.

Image

Image

Read Full Post »

20130923_101007

20130923_100918

20130923_101104

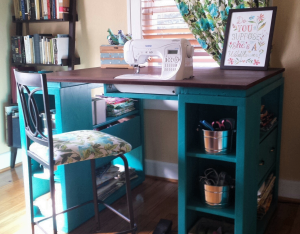
I have been looking at sewing furniture for years, but the prices always made my jaw drop. I have a small craft room, so I needed a table that could also triple as a cutting table and fabric storage. Thank you so much to Ana White for this plan! I built this table exactly to the plan for the Modern Craft Table in Ana White’s The Handbuilt Home, and it’s the PERFECT size.

So the sewing machine can sit flush with the top, making working on big sewing projects way easier, I traced the outline of my machine on the MDF and cut it out with a jig saw. Then I built a small shelf using a 1×12 scrap and 2 1×3 scraps. Putting the 1x3s on top of the 1×12 made the shelf 3.75 inches deep, which is exactly the depth I needed. I attached it to the underside of the tabetop using a pockethole jig and screws.

I built 2 boxes using 1/4 inch plywood, and installed drawer pulls on them, giving the illusion that the table has 2 drawers built in. This is where I keep my ugly stuff–interfacing and fabric scraps.

I got the color scheme for the table from the entryway console plan in The Handbuilt Home. In order to make the MDF top look like it had a wood grain, I applied mahogany gel stain with an old washcloth in very thick strokes that spanned the length of the tabletop. It soaked in and lost the “grain” look in some places, but the majority still looks like wood. I did have to apply several coats of polyurathane over the stain; the MDF has a prickly texture that grabs fabric and makes it hard to feed through the sewing machine.

My only complaint is that I didn’t quite think through the fact that seating is bar height and I’m 5’7″. It’s a little difficult to reach my sewing machine pedal. I may build a small stool for the pedal to sit on so I don’t have to half sit/stand to sew.

This is the first woodworking project I’ve done alone from start to finish: from going to Lowe’s and picking out the wood, to cutting the wood with a circular saw, assembly, and finishing. (Adam did carry it up the stairs for me. 🙂 )

2013-09-23 09.46.22

I’m so in love with this table! And now to finish the quilt I started 6 months ago….

Read Full Post »

Fabric Silhouettes

I love Amy Butler fabric. I love Amy Butler patterns. I love my dogs.

It was only a matter of time before I combined these three loves.

I present to you my fabric silhouettes. I got the idea from Amy Butler’s Nigella Silhouette pattern (available for free on her website—love those free patterns!!), and like most other things, adapted it to suit my taste and/or needs.

I chose Amy’s Daisy Chain line for this project because the blues, greens, and greys fit my existing decor. Of course any fabric will do; you just want to make sure it pops and is pleasing to your eye. For the background, any heavy-weight fabric will do–duck cloth, canvas, etc.

I got the silhouette images for free online, and printed a quarter of them per page on my regular printer. I taped them together to make one big image.


The basic how-to goes like this

  1. Iron fusible webbing to the back of your silhouette fabric.
  2. Pin the pattern to the front of the fabric, trace, and then cut out.
  3. Peel the paper backing off the fusible webbing, and iron it to the canvas/duck cloth to adhere.
  4. Using a satin stitch (a medium-width zigzag stitch with a very short stitch length—see image below), sew around the silhouette to secure.
  5. Using spray adhesive, adhere the canvas/duck cloth to a piece of foam board.
  6. Frame and hang!

I’ve been playing around with the idea of opening an Etsy.com store, and if/when that happens, these will definitely be items for sale. Look for that to happen some time after Christmas (I have LOTS to finish before Christmas.).

~~~~~~~~~~~~~~~~~

Switching gears, today is Day 3 of the Primal Challenge. I’ve been doing well. Except, I weighed myself this morning, and I’ve gained 2 pounds in the past week. Someone, please tell me, IS THIS NORMAL???? Because I’ve been working out hard and my food intake (as you can see in previous posts) has been damn near perfect. For the past 2 days anyway. Have any of you had this experience? I realize Grok didn’t weigh himself, so maybe I should stop altogether? Help, please!!

For today:

Breakfast: Smoothie with banana, Prograde, coconut milk, 2 tablespoons sunflower seed butter, 1 tablespoon unsweetened cocoa

Lunch: Fassoulia, turnip chips (from my CSA, yeah!!)

Snack: 2 hard-boiled eggs

Dinner: Not sure yet, probably mahi mahi and homemade aioli (which I didn’t end up having last night; after bootcamp I had some Greek yogurt and walnuts instead)

Workout: Rest day, 30 – 45 minute walk at some point today

Read Full Post »

New Drapes

I made curtains for my “new” living room the day I got my sewing machine. Unfortunately, I had no idea what I was doing when I made them. They were OK… they did the job… but they were not reflective of an accomplished seamstress (as I have become in the past 2 months).

I cut the material too short on the old ones, so there was no reusing them for new ones. Which sucked because I really loved the pattern.

But when God closes a door, he sends you a stock pile of fabric on craigslist.

I went to see Alice and her hoard of fabric again over Memorial Day weekend. I came home with a ton of really elegant and heavy taupe/brown cotton and some funky flowery, almost cartoonish cotton blend.

And this is what I did.

To make these drapes, I first pieced together the front, making sure the flowery top was exactly the same height from the top of the blue flange on all four panels.

Then I cleared the living room floor and laid down a thrifted white flat sheet (which would be the lining), and pinned each panel to the sheet, right sides facing. At the top of each panel, I pinned the tabs in between the panel and the lining so that the tabs were “hidden” between the two and raw edges were flush with each other.

I sewed along the sides and top, turned each right-side out, and ironed each side for a crisp edge. Then, I folded each side back onto the lining by an inch and stiched it down (so that an inch of the panel front wraps around to the back), and folded up the bottoms 4 inches and did the same (this also closed the opening where I turned them right side out).

I pressed one more time around all of the edges, hung them, and stood back and smiled. They’re really nice drapes. They’re thick enough to block out light and heat/cold, and I love the funky flowers and elegant brown combination.

Read Full Post »

Saturday will be the ninth–NINTH–time I’ve moved in seven years. Ninth. I still can’t get over that.

Inevitably when you do that much moving, you get good at doing it. I read somewhere sometime (to be specific) that moving is one of the greatest stressors in life. I believe it. It feels like you will never get everything loaded into the truck in any sort of organized fashion, and then you just have to turn around and unpack it. Make your round edges fit in square corners. Make the new place feel as cozy as the old place.

To that end, here are some of the best tips I have for you to stay relatively sane during packing and moving.

  • Start as soon as you can. Start purging the weekend after you find out you’re moving.
  • Lists! Make a list of everything–what to pack, what to not pack, when to call to change your address and drop of the cable box, what needs to be cleaned, etc. Right now I’m working off four lists: Still to Pack, Still to Clean, Timeline of Chores, and What to Leave for Cleaning.
  • Move gradually if you can. If you can’t, at least try to move gradually in your mind. Divide your move into three chunks: what can go now (or be packed now)–this would be stuff like Christmas decorations and grandmother’s quilts; what can go later (or packed later)–this would be stuff like wine glasses and DVDs that you could live without, but may not want to; and what must wait until the end–this would be stuff like shampoo, makeup, and ahem, shoes.
  • Don’t try to pack, clean, and move at the same time. Arrange for a few hours to come back to the empty house and check for anything missed or anything that needs to be cleaned.
  • Do as much administrative stuff as you can at work. That’s awful, I know, but it makes life so much easier. Change your address, pick up boxes, turn off your utilities, etc., at work.
  • Pack a bag like you’re going on a trip. Keep undies, makeup, shampoo, etc., in there to live out of once you get to the new place and don’t feel like unpacking 9 boxes to find your toothbrush.
  • Label every box. with which room in the house it belongs in, and what’s in it. Not only do I label, but I put a number on them indicating when they should be unpacked. 1 indicates the contents are important (like crafting supplies), whereas 10 can wait until the very end.
  • Store your belongings in moveable ways. I keep a lot of my towels, off-season clothes and shoes, art supplies, fine china, etc., in moving boxes under the bed. When it’s time to go, all you have to do is load them.
  • Get some bottled water and healthy snacks. No one likes to help you move to find out you have nothing to eat and no vessel to drink from. Get some paper plates and napkins, too.
  • Buy a few things for the new place. I’ve gotten so many eye rolls from Jeff about the amount of stuff I’ve bought for our new house, but having beautiful new things to look forward to sustains my energy and motivation for packing up the old stuff.
  • If you haven’t used it in a year (or since the last time you moved), throw it out.
  • Eat well and get plenty of sleep.
  • Stay as organized as possible. When you feel your mind starting to race, start making lists.

What packing or moving tips do you have?

Read Full Post »

I haven’t talked at length about this, because I’ve been waiting for more pieces to fall into place. Buuuuuttt… I’m moving in two months. Long distancing with Jeff is getting very, very old, and we want to move forward to the next chapter in our lives. The timing couldn’t be better because my lease expires in two months anyway. So, I’m Richmond bound.

What makes the situation so unbelievably awesome is that the giant evil corporation I work for turns out to have more of a heart than I originally suspected, because they’re converting my position into a teleworking position with very little fuss. Aside from the whole relationship thing, I’m so friggin stoked to have a change of scenery. I’ve been in this town for four years, and have been done with it for three and a half. It’s time to move on.

In order to facilitate an effective and efficient workday at home, I’m devoting most of my thought, energy, and decorating budget to creating my office. Whenever furniture purchasing or decorating opportunities present themselves, I always try to reuse and restore before buying anything new. I don’t recycle paper bags and bottles, so doing this is my way of helping the environment. Plus, each piece in my home becomes distinctively mine, and it’s way easier on my piggy bank.

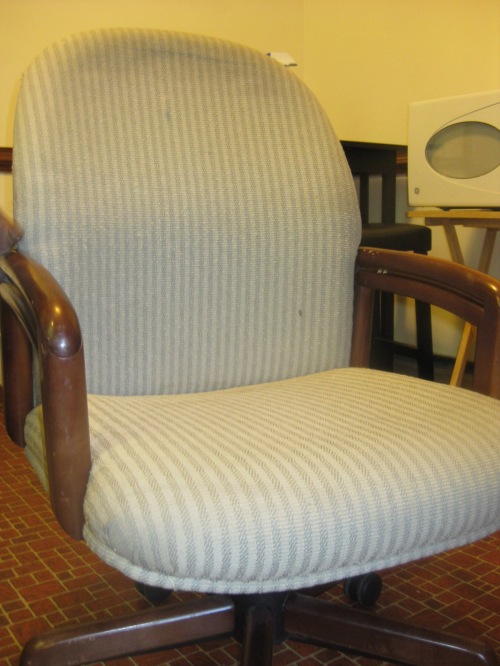
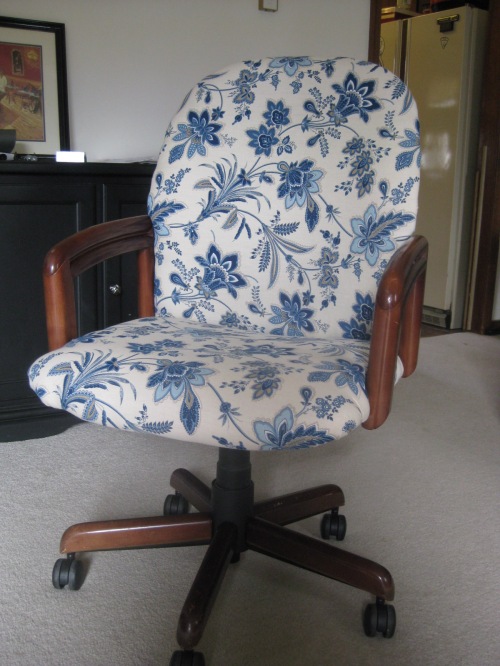
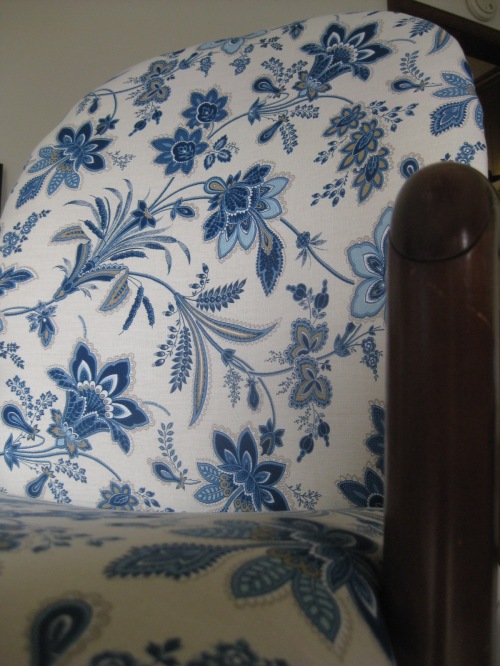
The first item I bought for my new office was an old, gross office chair from the thrift store for $10. Two yards of fabric and an afternoon later, I have a brand new chair.

This particular chair was a PAIN to take apart, but for our first upholstering experiment, I think we did pretty well.


Read Full Post »

If there were a society for dogs who wolf down food, Kane would be president. He eats with a fervor that I haven’t seen since, well, since I used to go to Golden Corral on Sunday mornings for brunch. (What?! College was my Fat Time.)

I switched him to a raw diet for a while, and in addition to being much better for him, it forced him to slow down to chew the bones and tendons and such. The result was a much happier digestive system, and a much more sated dog.

About three months into feeding him raw, I bought a case of chicken backs that smelled the teensiest bit “off.” After a few days of explosive diarrhea, I switched him back to kibble. While I firmly believe in a raw diet for dogs, I’m a little nervous to try it again after that, even though I fully realize that kibble is more susceptible to rancidity and spoiling than quality raw meat and veggies are. One day we’ll get back there, but for now, I’m sticking with a high quality, grain-free kibble. (I fed Evo for a long time, and recently switched to Taste of the Wild–similar ingredient list, but far less expensive. Check out http://www.dogfoodanalysis.com to research grain-free dry dog foods.)

Anyway, I digress. Kane rarely even chews his dry food. One, two, gulp, it’s gone. Eating that fast has some health risks, including bloat, and being homeless when your family can’t take your gas anymore.

One way to get your pooch to slow down is to put some sort of obstacle in his bowl. A tennis ball superglued to the bottom of the bowl, an upside down ramiken (like you see in resturaunts), or something similar will work. When Fido has to eat AROUND the object, he has to slow down a little.

But, if you live with The Lord of the Flies like I do, this may not be enough. Enter the Kong Genius.

When I saw these at the pet supply store, I was hesitant to buy them. “Genius?” I thought. “Am I being overly optimistic?” But I bought one, and he LOVED it. Stuffed full of yogurt and cookies and frozen, it keeps him busy for hours when I leave for work. A week or so ago, I bought the other shape (the blue one below), because I believed Kane to be ready for another challenge. While it is indeed more challenging, and nearly impossible to get cookies out of, it’s PERFECT for feeding him meals. I’ve been giving him breakfast in his Kongs, and have been incredibly pleased with the results. No more gas, he doesn’t seem hungry still when he finishes, and it takes him a good 5 -10 minutes to eat all of his food. They’re a bit expensive–around $17 each for the extra large size–but oh so worth it.


If you have a gobbler, I highly recommend these.

Read Full Post »

Few people know that I love to do artsy stuff and DIY just as much as I love to read and write. I have a degree from a prestigious university in the latter, and rarely share things I do in the former category, so it’s really no wonder. Additionally, writing and reading are mostly free, and in fact I get paid to do them. The kinds of DIY/art projects I like cost money, and when you’re constantly trying to get a hold of your spending habits, it isn’t really advisable to spend MORE on “superfluous” stuff like wood burning pens and an assortment of stencils.

But as a new year starts, as I age, and as I find myself looking down the barrel of a new chapter in my life alongside a wonderful and stable man, I realize that it’s so very important to not lose the dexterity to create the things I love creating. A new house will mean new furniture, and a house full of opportunities to dumpster dive and refurbish. (And also more disposable income to fritter away on some sweet acrylic paints and doilies.)

Enter New Year’s Resolution #1: Be and Do More Creative.

I started with a DIY tray that I totally ripped off from http://www.ashleyannphotography.com.

The materials

Jeff, measuring where to drill holes for the handles. Obviusly measuring and marking is a Man's Job.

Drill the holes...

Screw the handles on

I decided to "frame" my grandmother's scarf and some doilies to decorate the tray. I like the multi-generational feel it gives the tray: the scarf is probably from the 60s, the doilies give a Victorian feel, and the clean lines of the frame and handles are dinstinctively modern. Plus, I like being reminded of my grandmother each time I look at it.

Read Full Post »

Along with a penchant for bluegrass and home canned goods, my parents passed down extremely oily skin to me. I’ve never understood the discomfort of dry, itchy, flaky skin because even in the dead of winter, I have to blot oil from my nose and forehead.

Kane isn’t so lucky. This time of year finds him flaky, itchy, and uncomfortable. His fur gets very brittle and starts to fall out.

To keep him cozy and shiny, I take a two-part approach to this problem:

1. Internal treatment. This is comprised of two supplements:

  • Probiotics. I use a good probiotic meant for humans (Culturelle, found in the pharmacy near Maalox or other indigestion remedies), once a day in his food. Remember these are live cultures, so keep them in the refrigerator. Skin conditions are commonly an outward expression of what’s going on underneath, so just to be safe, I like to give his immune system an extra boost.
  • Olive oil, flax oil, or fish oil (whatever is on sale). He’s a big boy, about 100 lbs, so he gets a solid drizzle–probably 3 tablespoons–with his food twice a day. Many vets will tell you to monitor oil supplements because of the fat content. If your dog is on a grain-free diet (which he should be), you can ignore this. Oil fat won’t put pounds on your dog if his general carbohydrate intake is low.

2. External treatment. I grew up on a farm, and you wouldn’t believe how much I miss those smells. Last fall I wandered into our local farm supply store, Southern States, and mozied around the horse supplies, touching them and smelling them and remembering being a little girl right at home in a horse barn. I found a product we used to use after bathing the horses, which is literally called Hair Moisturizer. This stuff is amazing. I often use it myself to control flyaways and to prevent split ends. I dilute one tablespoon of Hair Moisturizer with 1/2 cup water in a small spray bottle, spray Kane down, and then brush him gently with a boar’s hair brush.

Proper diet, good probiotics, oil supplements, and a good external moisturizer should kick dry skin to the curb in a few days. If not, you may try slathering some olive oil on your pup’s coat and rubbing it in with a boar’s hair brush. If dry skin continues, consider taking Fido to a holistic vet to make sure there isn’t an underlying issue.

Read Full Post »

The neighborhood I live in is lined with big, old, gorgeous Victorian houses, most of which have been converted into apartment buildings. Most of these residents are med students or young professionals and many of them have young dogs. Kane and I walk and run around our neighborhood a LOT, and we meet several “new additions” every week.

These people mean well enough and want good, socialized pets. But they make so many mistakes simply because they do not understand canine behavior, and while their dogs may not grow up to be terrors, they will grow up lacking the confidence they need to be who nature intended them to be.

Let’s review a typical scenario.

Kane and I are running down the sidewalk. I am In The Zone, but notice a young woman and her 6-month-oldish boxer puppy walking toward us. Kane sees them both and his ears go up. The puppy sees us and begins to lunge forward with excitement. The young woman sees us, then sees Kane, and gets nervous. She pulls her puppy over to the side of the sidewalk, and makes it lay down (after telling it to about 20 times). She tells the puppy, “You need to lie down and not be a rude puppy.” Kane sees this and become suspicious: why is she making that dog lay down? Is it hurt? When we pass them, he stops to investigate, causing the puppy to break his Down, and the woman to start yelling at it. I let the dogs sniff for a few seconds, then we continue on our way, and the woman is left with a puppy lunging after us, feeling like she has a dog she cannot control.

Several things went wrong here.

First, sidewalks aren’t conducive to proper canine greetings. Only the most rude and aggressive of dogs will ever meet another head-on. Instead, dogs approach each other from the side. Watch dogs in the park, and I guarantee you two friendly ones will never meet each other head-on. So from the get go, both dogs were left with the impression that the oncoming dog may mean him or her harm. Thus, their spidey senses get activated, and they become very interested in the other.

Second, the woman, not knowing the above, set her dog up for failure in several ways. First, she pulled her pup to the side and made it stop moving. Her puppy then became a prey item for Kane. Second, she made her dog lie down. No, no, no, NO! People! Never, never make your dog lie down when he meets another dog, unless he wants to. Making your dog lie down forces him in a submissive position, which Nature may or may not have intended. Some dogs will instinctively lie down upon meeting another, but my experience is that most dogs are not that submissive, and most will never meet one that dominant on the sidewalk. So, when Kane and I pass the pup, Kane is made to feel that much more Alpha, and the pup is relegated to a submissive, vulnerable position that he does NOT want to be in.

The woman’s comment about being a rude puppy offers more insight. She’s obviously concerned that her puppy won’t behave “correctly” around Kane, and that something bad might happen. I had a rude puppy. He’s STILL a rude puppy. But without exposure to older, more mature dogs, a puppy will never learn. Dogs teach each other more than we’ll ever be able to teach them, and they’re much more patient than we give them credit for. My guess is that if the puppy had been rude (which I doubt; most boxer pups are just exuberant little things), Kane would have told him so, and he would’ve learned.

Third, the pup, being a puppy and not being a submissive robot, broke the Down the woman erroneously put him in, and learned a valuable lesson: I don’t have to lie down the first time she tells me, and I don’t have to keep doing it if there’s a distraction.

Here’s how the scenario should have gone (and please note that this ONLY applies to dogs who show no signs of aggression):

Kane and I meet a young woman with a boxer puppy walking toward us on the sidewalk. We’re both aware that head-on greetings are a no-no, so we move to the outsides of the sidewalk and allow the dogs to move toward each other in the middle. Instead of either of us restraining our dogs or making them lie down, we both give our dogs a Stand command, instructing them to stand on all fours and not make any sudden moves. The dogs sniff each other, the puppy bows to play, and after a few minutes of on-leash romping, Kane and I resume our run. The puppy is left feeling confident as a dog and the woman is left feeling confident as a handler.


How to Teach Your Dog the Stand Command

Place your dog in a Sit. Move to his right side, facing him. You will most likely need to crouch, unless you’re working with a Great Dane or Irish Wolfhound. Keep the leash in your right hand, and shorten it to 2 or 3 inches. With your right hand on his leash, move your left hand under his belly/flanks. Gently tap his flanks with your left hand and say, “Stand.” He will most likely try to move forward. Using your right hand, hold him steady and say, “No, Stand.” Once he is standing, praise him: “Good boy! Stand!” Repeat until he simply raises his haunches to stand without attempting to move forward.

After a few days of practicing the above, add a Stay command. Once he is standing, turn to face the same direction as him. Say, “Stay” and simultaneously pivot on your left foot, moving your right foot to turn and face him. If he moves, say “No! Stand.” And move him back to position. Work on this until you can face him and back away several paces. You can then graduate to adding distraction. Once you get to this point, try it in a sidewalk scenario, but leave the Stay off. Your pup should know at this point that Stand means stay on your feet and don’t move too much.

Read Full Post »
Older Posts »