Feeds:
Posts
Comments

Archive for the ‘Create’ Category

Rosette Pillow [DIY]

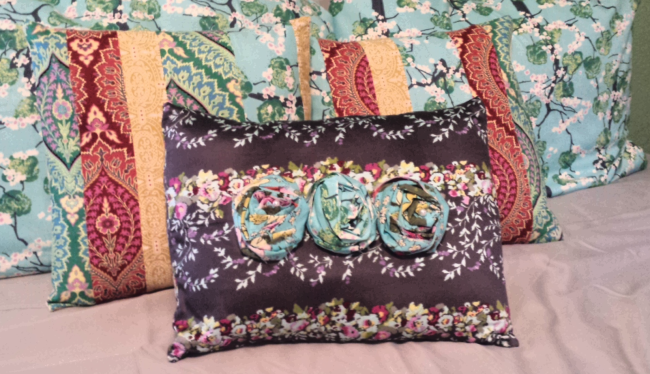
Rosettes are my thing right now. I’m putting them on everything. This pillow is the latest in this trend. It’s so cute and easy, how could I not share?

Image

Supplies

  • Fabric for the pillow
  • WOF (width of fabric) x 6 inch strips for each rosette
  • Pearls or other center accents
  • Spray adhesive
  • Glue gun and glue
  • Pillow form

Make it!

  1. Make a pillow cover to fit your pillow form. If you don’t know how to do this, Sew Mama Sew has a great tutorial here.
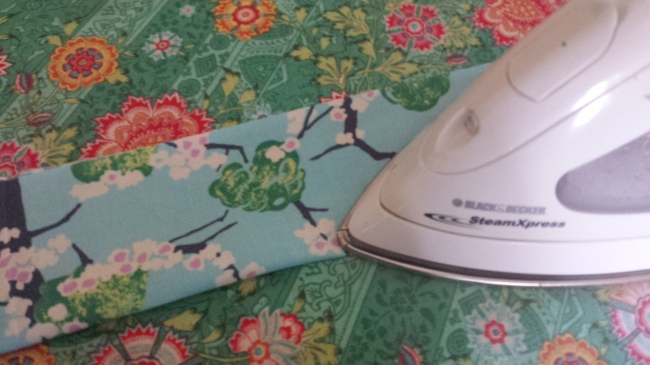
  2. Make your rosettes. Iron each WOF x 6 inch strip in half lengthwise, right sides out.
  3. Spray the entire thing liberally with spray adhesive.
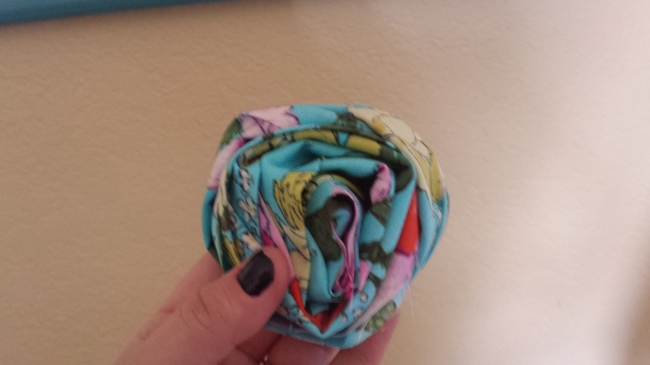
  4. Pinch on end in your left hand, and use your right hand to begin wrapping the strip around itself. Allow it to twist to make “petals.”
  5. Using a tiny bit of hot glue, glue your pearl or other accent to the middle of the rosette. Press down on the rosette with your hand to flatten it, secure the pearl, and secure the spray adhesive.
  6. Drizzle hot glue all over the back of the rosettes, and glue them onto the pillow case.
  7. Insert your pillow form. You’re done!

Image

Image

Please don’t look at my nails. I got a little over zelous picking off the spray adhesive.

Image

Image

Read Full Post »

20130923_101007

20130923_100918

20130923_101104

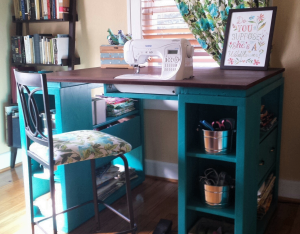
I have been looking at sewing furniture for years, but the prices always made my jaw drop. I have a small craft room, so I needed a table that could also triple as a cutting table and fabric storage. Thank you so much to Ana White for this plan! I built this table exactly to the plan for the Modern Craft Table in Ana White’s The Handbuilt Home, and it’s the PERFECT size.

So the sewing machine can sit flush with the top, making working on big sewing projects way easier, I traced the outline of my machine on the MDF and cut it out with a jig saw. Then I built a small shelf using a 1×12 scrap and 2 1×3 scraps. Putting the 1x3s on top of the 1×12 made the shelf 3.75 inches deep, which is exactly the depth I needed. I attached it to the underside of the tabetop using a pockethole jig and screws.

I built 2 boxes using 1/4 inch plywood, and installed drawer pulls on them, giving the illusion that the table has 2 drawers built in. This is where I keep my ugly stuff–interfacing and fabric scraps.

I got the color scheme for the table from the entryway console plan in The Handbuilt Home. In order to make the MDF top look like it had a wood grain, I applied mahogany gel stain with an old washcloth in very thick strokes that spanned the length of the tabletop. It soaked in and lost the “grain” look in some places, but the majority still looks like wood. I did have to apply several coats of polyurathane over the stain; the MDF has a prickly texture that grabs fabric and makes it hard to feed through the sewing machine.

My only complaint is that I didn’t quite think through the fact that seating is bar height and I’m 5’7″. It’s a little difficult to reach my sewing machine pedal. I may build a small stool for the pedal to sit on so I don’t have to half sit/stand to sew.

This is the first woodworking project I’ve done alone from start to finish: from going to Lowe’s and picking out the wood, to cutting the wood with a circular saw, assembly, and finishing. (Adam did carry it up the stairs for me. 🙂 )

2013-09-23 09.46.22

I’m so in love with this table! And now to finish the quilt I started 6 months ago….

Read Full Post »

Finished

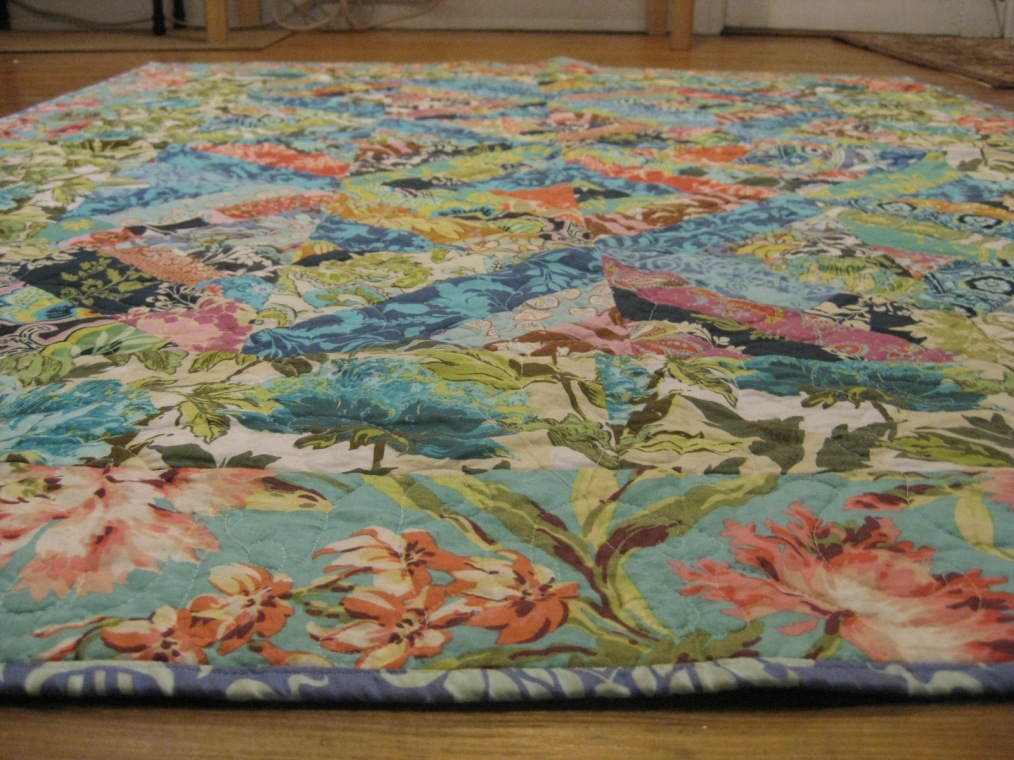
Disclaimer: this isn’t the quilt I planned to make when I posted a while ago. I made that one, and it looked fine, but it wasn’t THE quilt I wanted.

Luckily I had enough scraps to make another. And this one is perfection.

Image

Image

Image

Read Full Post »

Last December I ordered a dozen or so yards of Amy Butler’s Lark line. And boy, I’ve put it to good use. I’ve made: a queen-sized duvet and 2 matching shams, 2 throw pillows, a Blossom handbag, an enormous overnight tote, a Kindle case, a Cosmo bag, 3 coin purses, a Teardrop purse, a clutch for my sister, coasters, and I even hung 2 fat quarters on my living room wall.

Sadly, my hoard is shrinking. I used the last of my favorite, Heirloom Jade, earlier in the week. And when I say I used the last bit of it, I mean it. I literally have nothing left; no scraps, nothing. But I made something that I’ll see very often, which is good, because this fabric just makes me smile.

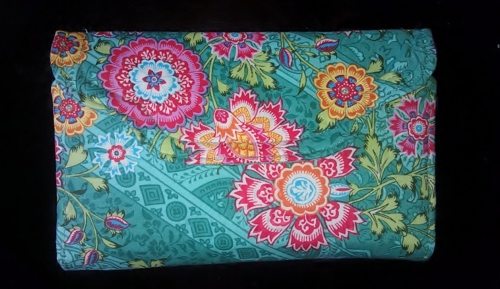
I’ve posted before about how I’m working through Amy’s Style Stitches book. I made my mom a Beautiful Balance checkbook cover for Mother’s Day, and modified that pattern to make a wallet for myself. If you’ll notice, ladies and gents, it comes complete with a zippered pouch on the back for change. I’m so proud of myself for figuring out how to do that.

Read Full Post »

Book-Style Kindle Case

Last night was my kind of night. I had a stroke of brilliance for a project around 7:30, the kind of stroke that can’t wait, and ran to my fabric hoard room to see if I had the needed the supplies. This project was even better because except for a small piece of fusible interfacing and a magnetic snap, I had everything I needed.

I rushed across town to Hancock’s for said supplies, made it 3 minutes before they closed, and ended up staying until 8:10 chatting the ladies who work there (fabric addiction… it’s like a sisterhood).

Pulling back into my neighborhood I stopped and bought a bottle of Shiraz. Because it was a beautiful, rainy night and I was making an awesome project with beautiful fabric.

I spent the next two hours putting this gem together. I don’t have instructions posted for several reasons. I may want to sell these and/or the pattern; I may teach these in the sewing classes I’ll be teaching this summer; and… ahem… due to the wine I may not remember exactly how I put it together. That last part being said, I need to make another to capture the steps and measurements, so if you’re interested in buying one, please let me know.

(Fabric used: exterior – Amy Butler’s Lark Heirloom Jade; interior – Amy Butler’s Soul Blossom Dancing Paisley)

Read Full Post »

My Bag-Making Binge

My dear friend Danielle knows me well. When I moved here, after going through a breakup, she knew that without projects to keep me busy, I would wallow in self pity and teeter on the cusp of despair for… well… until something changed.

She got me one of the best gifts I’ve ever received: a gift clearly picked with thought, and one that continues to keep giving.

I still wallowed for a while, but then I got busy. SUPER busy. As in, 7 bags complete busy.

My new everyday purse

Something I invented: a leash purse. Which is a coin purse attached to your leash, used for holding poop bags, keys, and phone while you're walking your dog. Isn't this so much prettier than the poop bag things they sell at the pet store?!

My dog-park bag, or walking-all-day bag. I specifically made it for carrying water to the dog park; that long handle is great for carrying across your shoulder.

It’s obviously a different kind of adrenaline than a skydiver or a mountain climber feels, but I get an incredible rush from perusing beautiful fabrics, choosing them, and then assembling them into something useful. It’s the artist in me, I suppose.

Note: All of these bags are available for sale (custom orders only) in my etsy shop.

Read Full Post »

Bird Silhouette on Fabric

As promised, here’s my awesome wall decoration tutorial!

Supplies:

  • Stretched canvas
  • Acrylic paint
  • Fabric large enough to cover the canvas
  • Paint brush
  • Staple gun
  • Pencil

Method:

  1. Put something good on TV or put on good music.
  2. Find a silhouette you like, and either print it out to cut out as a stencil, or pick something you feel confident that you’ll be able to freehand.
  3. Cover your canvas with fabric. Start at one end, staple in the middle, and then finish that end. Then staple the opposite end, and pull the fabric taut before stapling. Then repeat with the sides.
    1. When choosing fabric, it looks best to pick something that has a subtle pattern, and is mostly one color. Keep in mind the size of your canvas; the smaller the canvas, the smaller your fabric’s pattern should be.
  4. Draw your silhouette on the fabric with either a lead or a fabric pencil, using either a stencil, or praying that you don’t mess it up free handing (I chose this method).
  5. Paint your silhouette, being careful around the edges and making them as crisp as possible. I painted 4-inch sections, starting with the outside edges, and then filling in the middle.
  6. Admire how awesome and artistic you are.

Read Full Post »

Hey, did you guys know that I’ve fallen in love with Amy Butler fabric and patterns (and maybe the person, but I haven’t met her)?

Well, I have.

I whipped up these two tote bags on Tuesday night. Adorable, right?!


This one is a yoga mat/gym tote. I got the pattern from one of my favorite sewing sites, Sew4Home.  The pattern called for home-decor weight fabric, but I didn’t have any that I liked on hand. What I DID have on hand, however, was 17.5 yards of Soul Blossoms quilting-weight cotton. (What?! 17.5 yards is a reasonable amount to have on hand for something you really love.)

To reinforce it and give it the strength of a home decor weight fabric, I used Pellon mid-weight iron-on stabilizer. The outside is Amy Butler’s Soul Blossoms Joy Passion Lily Mulberry. The lining is Amy Butler Soul Blossoms Passion Twilight Peony Saffron.

The second bag, below was constructed exactly the same as the yoga mat tote, but the dimensions were different. I used a half yard of Amy Butler Soul Blossoms Passion Temple Tulips Cinnamon, cut in half across the middle to make 2 18″ x 22″ panels. The lining is Amy Butler Midwest Modern II Martini Ice.

~~~~~~~~~~~~~~~~~~~~~~~~~~~~~~~~~

I’m still going strong with the Primal Challenge. I’m actually going stronger now than I was when I first started, so that’s awesome. I’ve started tracking my food via LiveStrong’s My Plate again, which is incredible for calculating your total carb intake for the day. And really guys, staying between 50 and 100 grams isn’t all that hard. Especially when you can have delicious things, like whipped heavy cream and Stevia, totally guilt free, when a craving hits you. (Like it may or may not have hit me yesterday afternoon.)

In four days I’ve racked up 4 hours and 15 minutes of low-level activity. I’ve also gotten in 2 intense (well, okay maybe only one was intense) full-body strength training sessions, and yesterday I turned my 3-mile run into a sprint workout. (And OH. MY. GOD. My lungs weren’t expecting that.) It’s Wednesday, and I could stop working out until Sunday if I wanted to. LOVE that!

Here’s what’s on the menu today:

Breakfast: Smoothie with Prograde, unsweetened cocoa, frozen banana, and light coconut milk

Lunch: Cinnamon-crusted pork chop, mixed greens and mushrooms sauteed in bacon fat, along with some bacon

Snack: 2 hard-boiled eggs, celery, organic cream cheese

Dinner: Spaghetti squash, shrimp, homemade red sauce

Totals:

Cals: 1395 (HECK YEAH!!)
Fat: 81 g (Who cares? It’s all natural, Grokkish fat)
Carbs: 71 g (HECK YEAH!!!)
Protein: 102 g (Woohoo!)

Read Full Post »

The Third Time’s the Charm

As soon as I stitched my first stitch early last spring, I knew my ultimate goal was to make a quilt. Sure, tote bags, pot holders, pillows, etc. are fun and beautiful and can really spruce up your space, but I wanted to make things that would be handed down through generations.

The first quilt I made turned out beautiful, even though most of the squares don’t line up, and the backing is not nearly tight enough (which you can’t really tell, because I tied it instead of quilting it). The second quilt I made was intended to be a gift. I don’t have any pictures of it, but it was gorgeous and very precise. It was also very heavy, and some weird things started happening when I quilted it. I finished it, but just barely. It was a pain. And then, mere hours after I’d finished that beast of a project, I ruined it in the washing machine. Despite pre-washing the fabric, the colors bled and the whole thing turned a washed-out, ugly, dirty, sepia color. I have it on my bed now, because it still embodies all of my hard work, my blood, sweat, and tears. It’s a reminder to use caution at all steps of a project, and not to get lazy and not check to see what water temperature the washing machine is set to.

This morning I finished my third, and most lovely quilt. It’s smaller—about 60 inches by 70 inches—and I used a lighter, polyester batting. It was still a pain to maneuver, but so much easier. I still made plenty of mistakes, but they are “marks of the artist,” not embarrassing flaws.

I used a well-worn flat sheet for the backing, so it is super soft and perfect for snuggling under while reading with a cup of tea. The batting is low enough that I think it will be the perfect weight for winter or summer, when you just need to warm up a little.

I love this quilt. I love the simple, 90- and 45-degree angles of the piecing and the quilting, and how well they work with the busy-ness of the fabric.


This is the first quilt I’ve made that I’d feel comfortable selling because of how well it’s made. Naturally, that makes me want to hang on to it. I think I will for a little while.


~~~~~~~~~~~~~~~~~~~~~~~~~~~~

In other news, I am on day 5 of my own personal Primal Challenge. To date I’ve had no grains, though I slipped and had some refined sugar. (A can of sweetened condensed milk was the only dairy we had in the house, and I needed it for my coffee. You don’t know me—I NEED something milky with my morning coffee, and I NEED my morning coffee.) I’ve been pushing harder in my workouts and resting more during the day. I’ve slowed my walks with the dogs down, and we (well, they) sniff and gather information about our surroundings more. The best part is, after battling insomnia for weeks, I’ve started sleeping much better. My skin has also started to clear up and balance itself out.

Today’s log:

Breakfast: Cup of whole, grass-fed milk with 2 scoops Prograde

Lunch: Black bean and vegetable soup

Dinner: Spaghetti squash with red sauce

Workout: Rest day

Read Full Post »
Fabric Silhouettes

I love Amy Butler fabric. I love Amy Butler patterns. I love my dogs.

It was only a matter of time before I combined these three loves.

I present to you my fabric silhouettes. I got the idea from Amy Butler’s Nigella Silhouette pattern (available for free on her website—love those free patterns!!), and like most other things, adapted it to suit my taste and/or needs.

I chose Amy’s Daisy Chain line for this project because the blues, greens, and greys fit my existing decor. Of course any fabric will do; you just want to make sure it pops and is pleasing to your eye. For the background, any heavy-weight fabric will do–duck cloth, canvas, etc.

I got the silhouette images for free online, and printed a quarter of them per page on my regular printer. I taped them together to make one big image.


The basic how-to goes like this

  1. Iron fusible webbing to the back of your silhouette fabric.
  2. Pin the pattern to the front of the fabric, trace, and then cut out.
  3. Peel the paper backing off the fusible webbing, and iron it to the canvas/duck cloth to adhere.
  4. Using a satin stitch (a medium-width zigzag stitch with a very short stitch length—see image below), sew around the silhouette to secure.
  5. Using spray adhesive, adhere the canvas/duck cloth to a piece of foam board.
  6. Frame and hang!

I’ve been playing around with the idea of opening an Etsy.com store, and if/when that happens, these will definitely be items for sale. Look for that to happen some time after Christmas (I have LOTS to finish before Christmas.).

~~~~~~~~~~~~~~~~~

Switching gears, today is Day 3 of the Primal Challenge. I’ve been doing well. Except, I weighed myself this morning, and I’ve gained 2 pounds in the past week. Someone, please tell me, IS THIS NORMAL???? Because I’ve been working out hard and my food intake (as you can see in previous posts) has been damn near perfect. For the past 2 days anyway. Have any of you had this experience? I realize Grok didn’t weigh himself, so maybe I should stop altogether? Help, please!!

For today:

Breakfast: Smoothie with banana, Prograde, coconut milk, 2 tablespoons sunflower seed butter, 1 tablespoon unsweetened cocoa

Lunch: Fassoulia, turnip chips (from my CSA, yeah!!)

Snack: 2 hard-boiled eggs

Dinner: Not sure yet, probably mahi mahi and homemade aioli (which I didn’t end up having last night; after bootcamp I had some Greek yogurt and walnuts instead)

Workout: Rest day, 30 – 45 minute walk at some point today

Read Full Post »